iOS の Share Extensionで Safari からアプリを開く
概要
小説を聞こう (opens in a new tab)の iOS アプリに Share Extension を導入し、Safari からアプリを開く機能を実装しました。 今回はその実装方法を説明します。
Share extensions と Action extension のどちらを使うか
Safari からアプリを開く機能を実装するには、Share extension と Action extension のどちらかを使えばよさそうです。 Apple のヒューマンインターフェースガイドラインに、使い分けの記載がありました。
Share and action extensions (opens in a new tab)
Share extensions give people a convenient way to share information from the current context with apps, social media accounts, and other services. Action extensions let people initiate content-specific tasks — like adding a bookmark, copying a link, editing an inline image, or displaying selected text in another language — without leaving the current context.
Share extension は、現在のコンテクストからアプリケーション、ソーシャルメディアアカウント、その他のサービスと情報を共有するための便利な方法を提供します。Action extension では、ブックマークの追加、リンクのコピー、インライン画像の編集、選択したテキストの別言語表示など、コンテンツ固有のタスクを、現在のコンテキストを離れることなく開始することができます。
今回は Safari からアプリを開く機能を実装するので、Share extension を使うことにしました。
動作の流れ
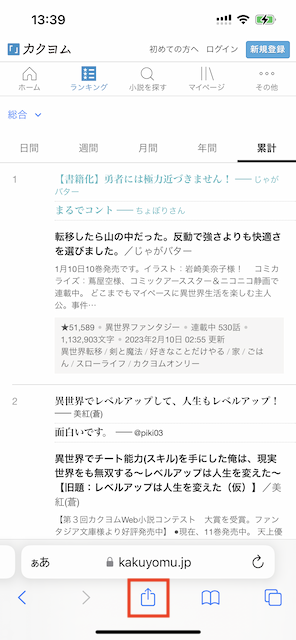
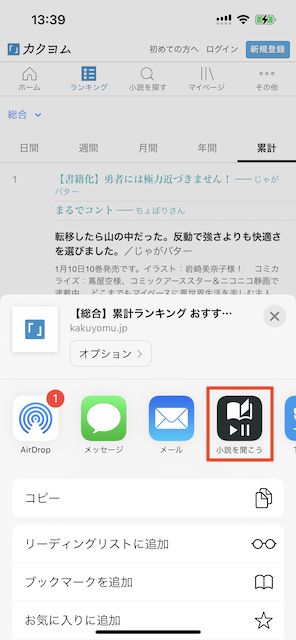
- Host app(Safari)の共有ボタンをタップ > Containing app(小説を聞こう)をタップ。
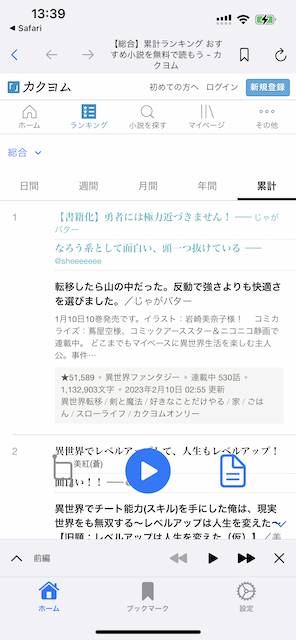
- Share Extension は Host app の URL を取得し、Custom URL Scheme で Containing app を開く。その時、Host app の URL は エンコードして Custom URL Scheme のホスト部に指定する(例: listen-to-novels://https%3A%2F%2Fwww.google.com)
- Containing app は Custom URL Scheme のホスト部を デコードして、その URL を WebView で表示する。
Containing app の実装
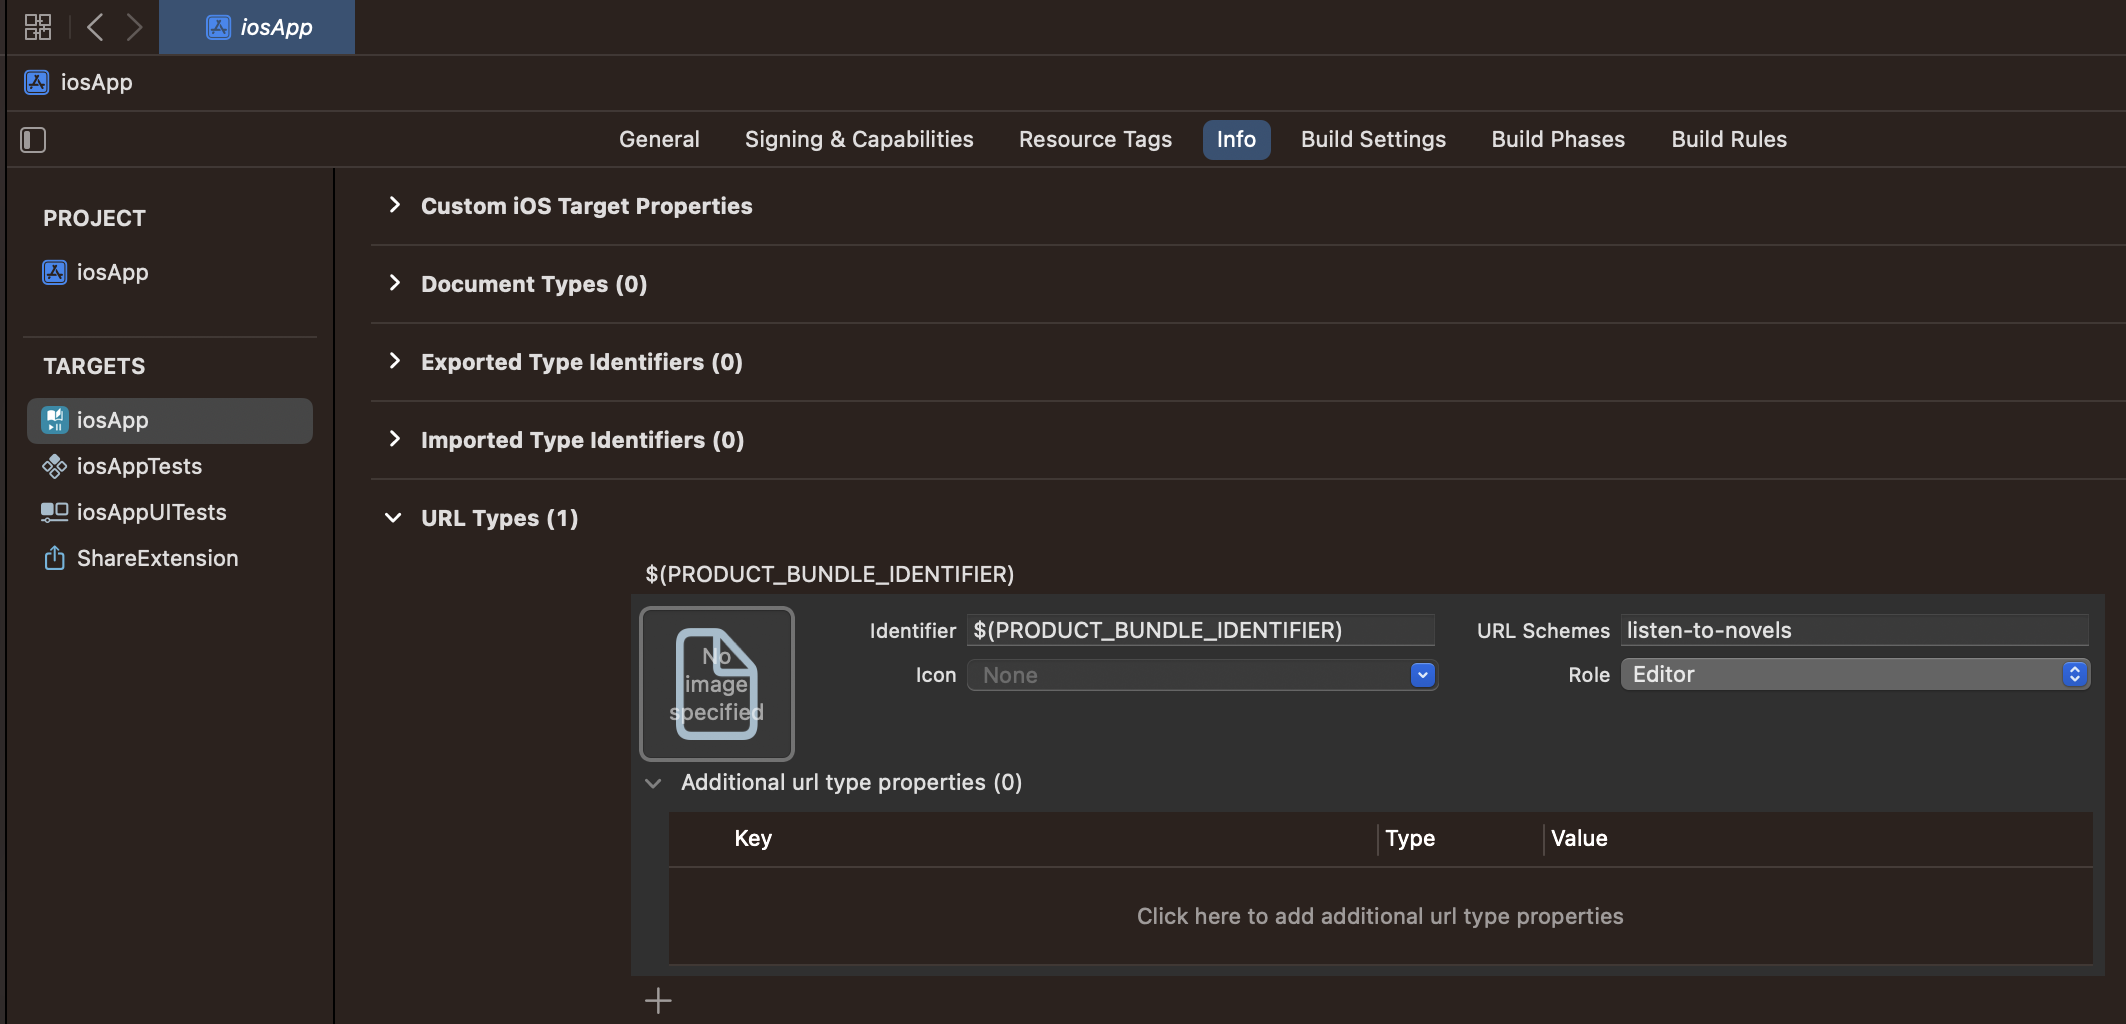
1. Custom URL Scheme を設定する
Target > Info > URL Types に以下のように入力してください。
- Identifier: $(PRODUCT_BUNDLE_IDENTIFIER)
- URL Scheme: 任意で他のアプリと重複しない文字列
- Icon: None
- Role: Editor
2. SwiftUI で onOpenURL イベントをハンドリングする
メインの WindowGroup 直下のビューに onOpenURL 修飾子を指定します。 その中で、Custom URL Scheme のホスト部に指定された URL を開く処理を実装します。
@main
class ListenToNovelsApp: App {
    var body: some Scene {
        WindowGroup {
            RootView()
                .onOpenURL(perform: { url in
                    // url.hostにURLをパーセントエンコードした文字列が入っているので、デコードしてURLを開く
                    if let host = url.host,
                       let urlString = host.removingPercentEncoding {
                        // URLをWebViewで開く処理
                        self.store.dispatch(MainAction.GoToNovelPage(url: urlString))
                    }
                })
        }
    }
Share Extension の実装
1. Share Extension を Target に追加
File > New > Target... から Share Extension を選択。
Product Name は「ShareExtension」にしました。
2. ShareViewController.swift を書き換える
Host app から渡された URL を取得し、Custom URL Scheme で Containing app を開く処理を実装します。
import SwiftUI
import UniformTypeIdentifiers

class ShareViewController: UIHostingController<ShareView> {
    enum ShareError: Error {
        case cancel
    }

    required init?(coder: NSCoder) {
        super.init(coder: coder, rootView: ShareView())
    }

    override func viewDidLoad() {
        super.viewDidLoad()
        Task {
            _ = await openAppWithUrl()
        }
    }

    override func viewDidAppear(_ animated: Bool) {
        super.viewDidAppear(animated)
        extensionContext?.completeRequest(returningItems: nil)
    }

    private func openAppWithUrl() async -> Bool {
        guard let item = extensionContext?.inputItems.first as? NSExtensionItem,
              let itemProvider = item.attachments?.first else { return false }
        guard itemProvider.hasItemConformingToTypeIdentifier(UTType.url.identifier) else { return false }
        do {
            let data = try await itemProvider.loadItem(forTypeIdentifier: UTType.url.identifier, options: nil)
            // URLをパーセントエンコードし、Custom URL Schemeのホスト部に指定してopenURLでアプリを開く
            guard let url = data as? NSURL,
                  let encodedUrl = url.absoluteString?.addingPercentEncoding(withAllowedCharacters: .urlHostAllowed),
                  let openAppUrl = URL(string: "listen-to-novels://\(encodedUrl)")
            else { return false }
            return await UIApplication.sharedApplication().open(openAppUrl)
        } catch let error {
            print(error)
            return false
        }
    }
}
3. ShareView.swift を作成
このクラスは SwiftUI で UI を構築するためにありますが、今回は UI は使わないので、body に EmptyView()を指定します。
import SwiftUI

struct ShareView: View {
    var body: some View {
        EmptyView()
        // UIが必要な場合はここに書く
        // https://qiita.com/mume/items/61091237085d9948724c
    }
}
4. UIApplication+.swift を作成
Share extension から openURL メソッドを呼び出すための黒魔術を書きます。
import UIKit
extension UIApplication {
// https://stackoverflow.com/a/36925156/4791194
public static func sharedApplication() -> UIApplication {
guard UIApplication.responds(to: Selector(("sharedApplication"))) else {
fatalError("UIApplication.sharedKeyboardApplication(): `UIApplication` does not respond to selector `sharedApplication`.")
}
guard let unmanagedSharedApplication = UIApplication.perform(Selector(("sharedApplication"))) else {
fatalError("UIApplication.sharedKeyboardApplication(): `UIApplication.sharedApplication()` returned `nil`.")
}
guard let sharedApplication = unmanagedSharedApplication.takeUnretainedValue() as? UIApplication else {
fatalError("UIApplication.sharedKeyboardApplication(): `UIApplication.sharedApplication()` returned not `UIApplication` instance.")
}
return sharedApplication
}
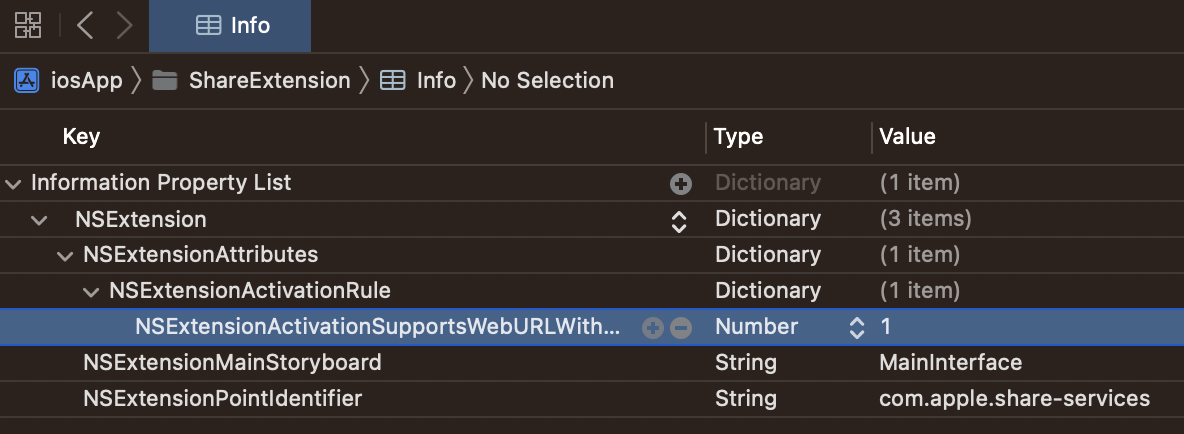
}5. Info.plist の設定
- NSExtensionActivationRule の Type を Dictionary に変更します。
- その下に NSExtensionActivationSupportsWebURLWithMaxCount を追加します。
参考
- Android 版の実装はこちら
- Creating an App Extension (opens in a new tab)
- SwiftUI で Share Extension を実装する (opens in a new tab)
- [SwiftUI]Deep Link で値を受け取り画面を出し分けする (opens in a new tab)
- How do you create a Share Extension in iOS8 without a share UI (opens in a new tab)